Hot tub poses for photos that look natural
Hot tub poses for photos that look natural: solo, couple and group ideas, dusk light, steam, and how to protect your phone and your guests' privacy.
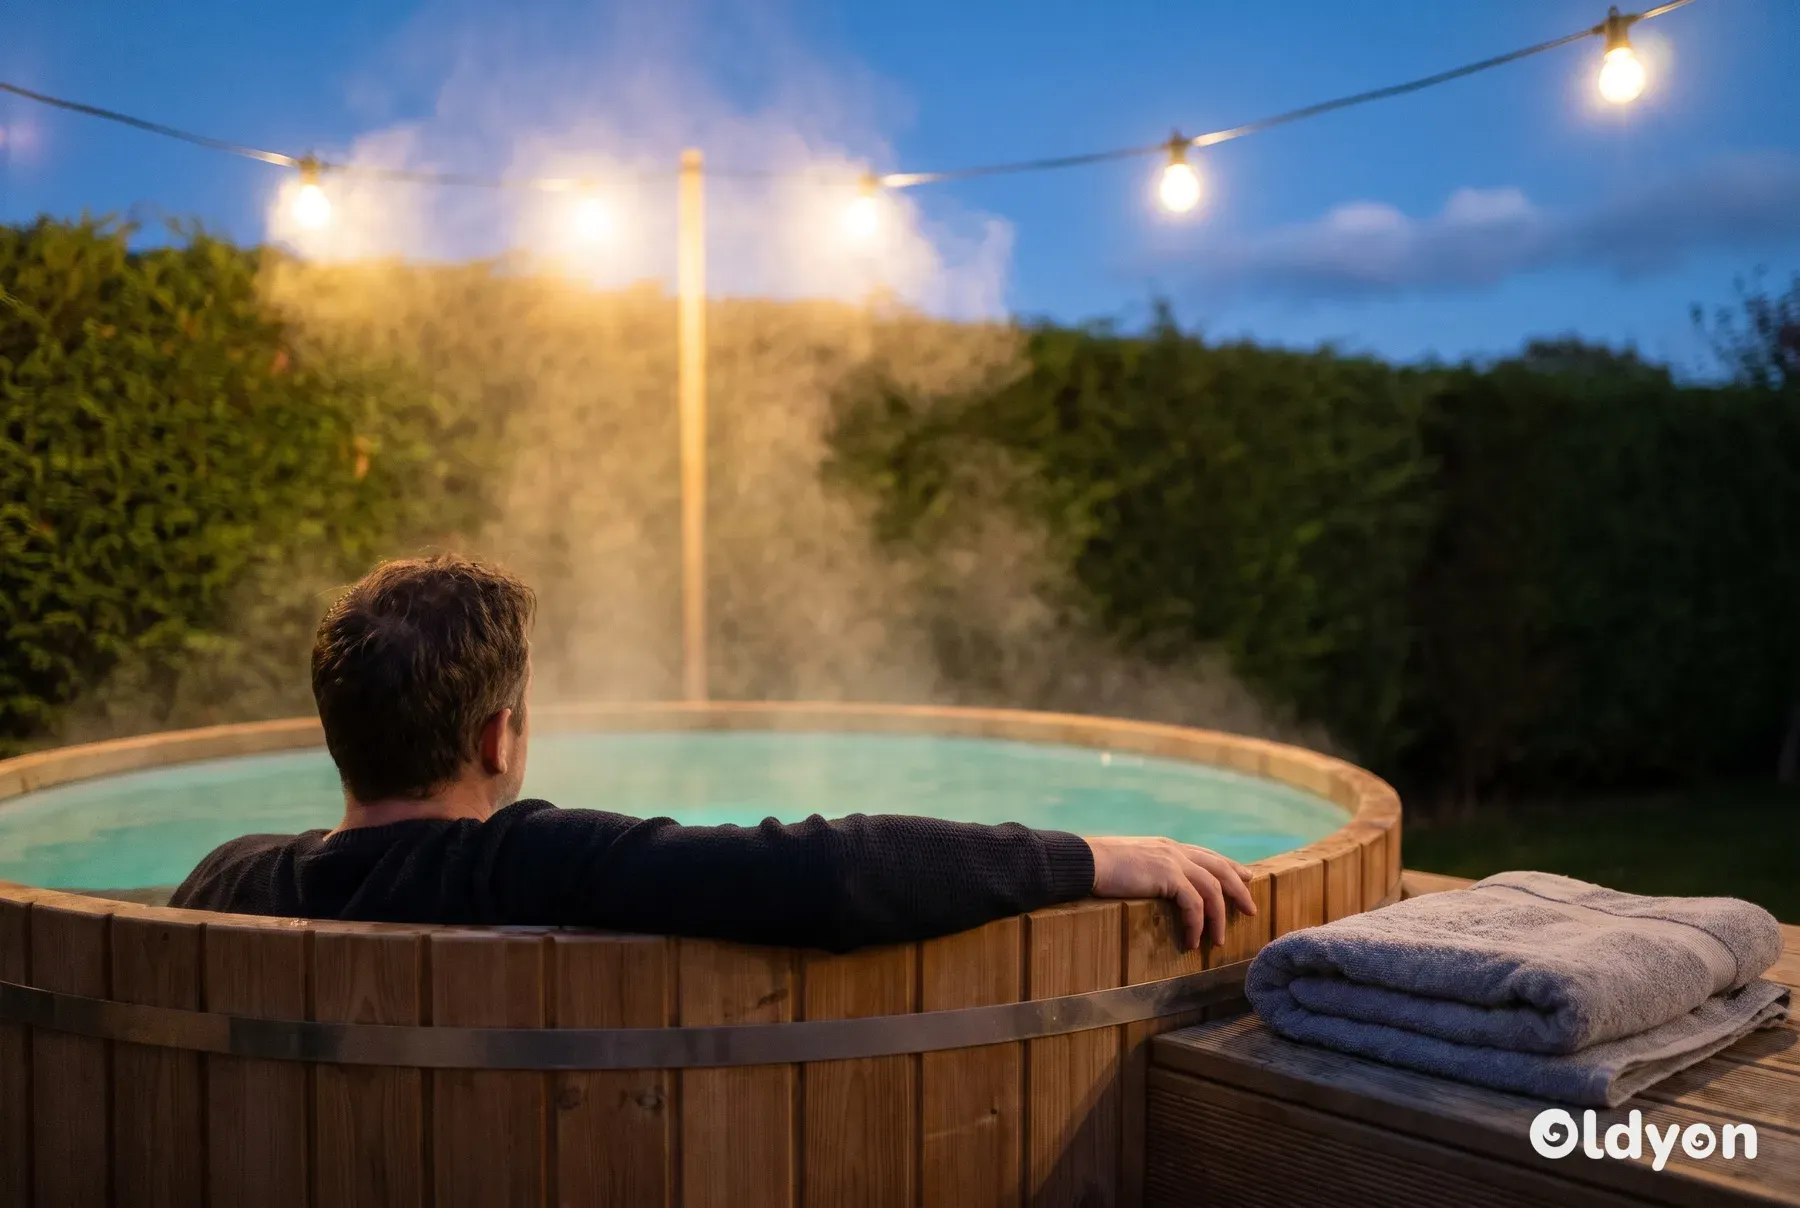
The best hot tub poses for photos are the ones that feel like a normal soak: sitting on the edge, resting shoulders-deep and looking at the view, or laughing with the people next to you. Shoot at dusk, let the steam add atmosphere, and keep the camera low and steady rather than staging stiff poses.
This guide covers poses for one person, for couples and for groups, then the light, angles and steam that make them work. It also covers the practical side: keeping phones out of the water, how long to stay in, and how to make sure everyone is happy with the photos before anything is shared.
What should you prepare before a hot tub photo shoot?
Good photos start with a tub that looks cared for. Clear, sparkling water reads well on camera, while cloudy or foamy water is the first thing people notice. Test and balance the water a few hours before, aiming for free chlorine 3-5 ppm (or bromine 3-5 ppm) and pH 7.2-7.6, so it has time to settle.
Then look at the scene the camera will see. Five minutes of tidying makes a bigger difference than any editing app.
- Remove chemical bottles, test strips, hoses and the cover lifter from view, or turn the lifter so it sits behind the tub.
- Fold towels neatly and keep them in one spot, ideally a soft neutral colour.
- Wipe the tub rim and the cabinet so there are no water marks or leaves.
- Swap glass drinkware for clear plastic or polycarbonate glasses. Broken glass in a hot tub usually means draining and cleaning the whole tub.
- Have a tripod or a stable surface ready, a few metres from the water.
- Agree with everyone in advance that photos are being taken, so nobody is surprised.
- Charge the phone or camera fully before you start. A battery that dies halfway through is one of the most common reasons a shoot gets cut short.
- Put a non-slip mat at the edge of the tub before any poses that involve climbing in and out or sitting on the rim.
- Keep one folded towel spare as a prop. Draped over the rim, it adds texture and a cosy feel to the frame.
- For evening shots, use battery-operated LED floating candles. They are a safe prop that adds a soft glow to the water surface. Keep real candles and any other open flames away from the tub.
If your garden is overlooked, think about what is behind you. A neighbour's window or a busy footpath in the background can make photos awkward to share. Our guide to hot tub privacy ideas for UK gardens covers screens, planting and pergolas that also make a softer backdrop.
Solo hot tub poses for photos that look natural
Solo shots work best when you are doing something, not posing for the camera. Give your hands a job, look at something other than the lens, and let the photographer take several frames while you move slowly. Natural expressions come between poses, not during them.
Spend the first five minutes in the water simply relaxing, with no camera out. Warm water eases muscle tension, and relaxed faces and shoulders photograph far more naturally than tense ones.
A few habits help every solo pose:
- Take the shot as the person slowly breathes out. Muscles relax on the exhale and the face looks softer.
- For calm poses, wait for bubbles and ripples to settle so the water surface looks still.
- A soft gaze with slightly parted lips usually photographs better than a forced smile.
- Take 5-8 frames in a row for each pose to catch the small changes in expression.
- Use the phone's rear camera rather than the front selfie camera where you can, because it usually has a higher resolution.
- For close face portraits, hold the camera slightly above eye level and tilt it about 15 degrees down. Never shoot upwards from below the chin, which is unflattering for almost everyone.
- For close selfies, hold the phone about 45-60 cm (18-24 inches) above eye level and tilt it 10-15 degrees down. This lengthens the neck and avoids the distortion a front camera gives when it is very close to the face.
The edge sit
Sit on the rim or the highest seat with your legs in the water and your hands resting either side of you. Lean back slightly and look out towards the garden. This pose shows the tub and the setting, and it keeps you cool, which helps if you plan to take a lot of photos.
To avoid a stiff look, try a version with the upper body leaning forward about 10-15 degrees. Point your toes down in the water to lengthen the legs, and bring your chin slightly forward and down to define the jawline.
For a version facing the camera, place both hands flat on the rim beside your hips and keep your arms slightly bent rather than locked straight. Shoot from eye level or a little below, so the water appears to stretch out behind you.
Shoulders-deep, looking at the view
Sink down so the water reaches your shoulders and rest one arm along the rim. The photographer stands behind and slightly to one side, so the shot shows you, the water and whatever you are looking at. This is the calmest, most relaxed pose, and it works well with steam.
Drop your shoulders completely rather than holding them up. Turn your head 20-30 degrees to one side, or slightly towards the view, so the camera sees a three-quarter profile rather than just the back of your head. This looks more dynamic than facing the camera straight on.
For a portrait version, sink until the water sits right at your collarbone. Your face and neck stay fully visible, and the water surface frames your face.
The open-arms back view
For a scenic variation with your back to the camera, sit upright at the far end of the tub and rest both arms open along the rim. Place the camera on a stable stand at the opposite end, slightly raised. Use a 10-second self-timer or a remote shutter, so the frame shows your back and the view beyond.
Turn your face slightly towards the view, so the camera catches a three-quarter profile instead of only the back of your head. A partly visible face reads better in the photo than one that is fully hidden.
The relaxed lean
Rest both forearms on the rim and lean your chin or cheek on them, as if you are watching something in the garden. It looks casual and hides any tension in the shoulders. Shoot from slightly below eye level to keep it natural.
The corner lean
Lean one shoulder and your upper back into a corner of the tub. Cross your arms loosely or let one arm float on the water, and turn your face 30-45 degrees away from the camera. Shoot from water level for a relaxed, confident look.
Do not watch the lens in this pose. Use the self-timer or ask a second person to take the shot while you look away, as if you have been caught in the middle of a thought.
The over-the-shoulder glance
Sit with your back to the camera, then turn your head part of the way towards it without looking directly into the lens. Ask the photographer to take a burst of shots as you turn. One of them will usually catch a relaxed, unforced moment.
Rotate your upper body as well as your head. A twist through the torso looks more dynamic than just turning the neck, and it is more comfortable to hold.
Place the camera at the far end of the tub and slightly raised. The pose works whether you are seated or standing in the water.
Drink in hand
Hold the glass at chest height with your arm slightly bent, and tilt it so the liquid catches the light. Rest your free hand on the rim. Take some frames looking at the glass and some looking at the camera, then choose the version you like.
A stemmed glass makes this shot look more elegant. Stemmed glasses are available in clear plastic or polycarbonate, so you do not need real glass anywhere near the tub.
For a softer variation, let your free hand lightly touch your collarbone instead of resting on the rim. This shot works best taken from slightly above, with the camera angled down about 15-20 degrees.
The splash
For a playful shot, sweep both hands quickly outwards across the surface to throw up water. Shoot it in burst mode and repeat three or four times, because the first attempt rarely catches the best arc. Keep the camera well back from the splash.
Take some frames looking at the camera and some looking slightly away. Looking away gives the photo a more candid feel.
The winter steam shot
On a cold evening, wear a knitted beanie or wrap a towel round your shoulders. Place the camera slightly above and to one side, so it catches your face and the steam rising behind you. This pose suits the darker months, when steam is at its thickest.
Either the edge sit or the shoulders-deep pose works well for this shot. Try it in the blue hour just after sunset, when the cool light of the sky contrasts with the warm steam rising from the water.
If there is snow or frost on the decking or in the garden, include it in the frame. The cold setting next to the warm water and rising steam makes the scene more striking than the same shot taken in summer.
Hands and details
Not every photo needs a full person. A hand holding a warm mug on the rim, fingers trailing through the bubbles or a book resting on a folded towel tells the same story. Detail shots are also the easiest to share if you prefer not to show your face online.
The overhead shot
Shooting from above shows the shape of the tub, the water colour and the people in it. Only do this from a safe, stable position such as a first-floor window or a step on dry decking. Never hold a phone out over the water at arm's length, because that is how most phones end up in the tub.
For portraits, avoid shooting straight down from directly overhead at 90 degrees. That angle mainly shows the top of the head. Save the true overhead view for shots of the whole tub.
Which couple poses work best in a hot tub?
Couple photos look natural when they show how you actually spend time together. Talk, laugh and relax for a few minutes before the camera comes out, then keep chatting while the photos are taken. If you are planning a tub mainly for two, our guide to choosing a hot tub for couples covers seat layouts that also photograph well.
- Side by side, looking at the view: sit next to each other, shoulders touching, both facing the garden or the sky. Shoot from behind for a peaceful, private feel.
- The toast: face each other and raise your drinks. Take the photo just after the glasses touch, when you are both smiling.
- The lean back: one person sits slightly behind the other, who leans back against them. It shows trust and comfort without looking staged.
- The shared laugh: one person tells a story or a joke while the photographer takes a burst. Real laughter is almost always the best photo of the evening.
- Heads close together: rest your foreheads or temples together with eyes closed. Keep this one gentle and quiet, and shoot from the side.
Toast tips: sit close enough that your knees nearly touch, and look at each other rather than the camera. Shoot from the side at water level, which works better than straight on.
To catch the glasses actually clinking, set burst mode first. Count down from three together, then clink firmly. Pick the frame where both glasses touch and both faces look natural.
Lean-back tips: the front person rests their arms on the water. The back person wraps their arms loosely round the front person's shoulders or waist. This pose also suits friends and family, not just couples.
For the lean back, the person behind should sit upright against the tub wall rather than slouching. Both people look forward, either at the camera or at a shared view. Take the shot from slightly above, aimed straight at both faces.
Side-by-side tips: rest your outside arms along the rim. Shoot from behind and slightly above during golden hour, so the low light falls on the water and the garden.
The side-by-side pose also works with both people sitting up on the rim instead of in the water. Your inside arms can touch or rest separately, whichever feels more natural to you.
Shared-laugh tips: sit close with your shoulders touching, and look at each other rather than the camera. Set the camera on a fixed tripod and keep burst mode running continuously while you chat. Afterwards, pick the frame where both faces look natural.
Heads-close-together tips: let your hands rest on the water, on each other's shoulders or clasped together. Do not force a smile. Avoid a straight-on angle, because it only shows the back of one person's head.
For heads close together, start with your faces about 15-20 cm (6-8 inches) apart. Lean in slowly until your foreheads touch lightly, with no pressure. Close your eyes or let your gaze drop softly downward, and place the camera at water level, slightly to the side.
For a couple on their own, a tripod and the camera's self-timer or a small remote shutter work better than asking a friend. You can relax, take your time, and nobody else is in the garden with you.
How do you pose a group in a hot tub?
Groups are harder because some faces end up hidden or half in shadow. The trick is to vary height and angle so everyone can be seen, and to give the group something to do together.
- Place the photographer at one corner of the tub rather than the middle of one side. A corner angle shows more people with fewer heads blocking each other.
- Ask people further from the camera to sit on higher seats and people closer to sit lower. This creates natural layers.
- Leave small gaps between heads so each person has their own space in the frame.
- Give everyone the same action, such as raising a glass, leaning back to look at the sky, or turning towards the person telling a story.
- Take a burst of at least ten photos. In a group, someone always blinks or looks away.
- Swap the photographer at least once, so the person behind the camera is in some of the photos too.
If the tub is full, have one or two people sit on the step or the edge outside the water. It adds variety and gives anyone who is getting too warm a natural reason to cool down.
When is the best light for hot tub photos?
The most flattering time is dusk. In the half hour after sunset, the sky turns a deep blue, the light is soft, and any garden lights you switch on start to glow without looking harsh. Midday sun is the hardest light, because it creates strong shadows on faces and glare on the water.
Golden hour comes just before that, roughly the 30-60 minutes before sunset. Face the person towards the low sun rather than putting it behind them. Light from behind turns people into silhouettes, which is only right if that is the effect you want.
Time or light | What it looks like | Best for |
|---|---|---|
Midday sun | Harsh shadows, bright glare on water | Overhead shots of the tub |
Golden hour | Warm, low, soft light | Couples, solo portraits |
Dusk (blue hour) | Blue sky, glowing lamps | Steam, atmosphere, groups |
Full dark | Only your own lights show | Tub lights, close details |
Overcast day | Even, soft, no shadows | Groups, detail shots |
Warm garden lighting does a lot of the work. Festoon lights above the tub, low lanterns on the decking or a single uplight on a nearby tree all add depth. Our article on patio hot tub ideas, from layout to lighting has more on placing lights so they flatter the tub instead of shining into the camera.
Avoid cool-white lights placed directly above the tub. Light from overhead casts unflattering shadows down the face, under the eyes and below the nose.
For night portraits, a small battery-powered ring light gives soft, even light on faces. Place it at roughly face height and well back from the water, on a stable stand that cannot tip towards the tub.
If your tub has its own coloured lights, try a soft white or pale blue setting. Strong reds and greens often make skin look unnatural. Turn off the camera flash, because it lights up every water droplet and steam particle and flattens the scene.
Using the rule of thirds
Turn on the grid in your phone's camera settings. It divides the screen into nine equal boxes. Place the person or couple on one of the vertical lines instead of in the centre, and put the horizon or the rim of the tub on one of the horizontal lines. This simple change makes photos look more balanced and less like a snapshot.
The grid setting is usually in the camera settings under a name such as Grid or Guidelines. For a stronger composition, put the face or body on one of the four points where the grid lines cross. If a shot still feels off, move the person one grid box to the left or right.
For a raised selfie, place your face on the upper-left or upper-right point where the grid lines cross. The water then fills the lower part of the frame, which shows clearly where the photo was taken.
You may also see this called the two-thirds rule. It is the same idea: the person fills about one third of the frame, and the water, sky or garden fills the other two thirds.
Choosing the angle
Hold the camera at roughly the height of the people in the water, or slightly lower. Shooting down from standing height makes people look small and shows too much of the water surface. Low angles also catch the steam against the sky.
The exception is close face portraits. For those, raise the camera slightly above eye level and tilt it down a little, as described in the solo poses above.
Camera height sets the mood of the photo, so match it to the pose:
- Overhead: shows the shape of the tub and the colour of the water.
- Eye level: gives a natural, everyday portrait.
- Water level: makes the shot feel intimate and immersive, as if the viewer is in the tub too.
How do you use steam for atmosphere?
Steam is visible when the air is much colder than the water. That is why autumn and winter evenings in the UK and northern Europe give the best results. On a still night, steam rises in soft columns. On a windy night, it blows sideways and quickly disappears.
- Keep the cover on until the moment you start shooting, so warm, moist air builds up underneath.
- Lift the cover slowly. The first minute after opening usually gives the thickest steam.
- Place a light behind or to the side of the tub, not behind the camera. Light coming through the steam makes it glow, while light from the front makes it look like fog.
- Turn the jets off for calm, rising steam, or on low for movement on the water surface.
- Use the camera's exposure control to darken the image slightly. This keeps the steam visible instead of washing it out to grey.
There is no need to turn the heat up for more steam. Keep the water at your usual temperature and never above 40°C (104°F). A colder evening does far more for steam than a hotter tub.
Steam also fogs camera lenses. If your phone has come from a warm house into cold air, or has been near the water, wipe the lens with a soft dry cloth before each set of photos. A blurred, milky photo is usually a fogged lens, not a camera fault.
How do you keep your phone safe near the water?
Most phones that end up in a hot tub fall from a hand or the rim. Many phones carry a water resistance rating, but manufacturers usually test this in still fresh water, and many warranties do not cover liquid damage. Warm, treated water and steam are not the same conditions, so check what your phone maker says before relying on it.
- Decide on one person as the photographer and keep them out of the water while they shoot.
- Dry your hands fully before picking up a phone, and keep a dry towel within reach of the camera spot.
- Use a tripod or a stable surface on the decking at least an arm's length from the rim.
- Use the self-timer, a remote shutter or voice control so nobody needs to reach over the water.
- If you want shots from inside the tub, use a waterproof pouch with a wrist strap, and keep it above the surface.
- Put the phone back in a dry place between shots, not on the rim or the cover.
Choose the self-timer's 10-second setting rather than a shorter one. It gives the person in the photo enough time to press the shutter, get back into position and settle into the pose before the picture is taken.
When choosing a pouch or case, look for a rating of at least IPX7, which means it is tested to be submerged to 1 metre (about 3 feet) for 30 minutes. A case that is only described as splash resistant is not enough near a hot tub.
Do not hand a phone to someone sitting in the water. Wet hands get water into buttons and ports faster than a splash does, and a wet phone is easy to drop.
Never charge a phone, or run any mains-powered lamp, speaker or extension lead, beside the hot tub. Use battery or outdoor-rated low-voltage lights placed where they cannot fall into the water. If anything electrical does go in, do not reach in after it: switch off the tub at the isolator first.
If a phone does fall in, take it out quickly once the tub is switched off, power it down, dry the outside and follow the manufacturer's advice. Avoid putting it on a radiator or using a hairdryer on it.
How do you respect guests' privacy when taking hot tub photos?
People in swimwear are more exposed than at most social events, so treat hot tub photos with extra care. A good host makes it clear that taking part is optional and that nothing goes online without agreement.
- Ask before you start taking photos, and accept a no without fuss.
- Show people the photos they appear in and delete any they do not like.
- Ask each person before posting, tagging or sending a photo to a group chat.
- Avoid sharing the location of your home or a holiday rental in captions or tags.
- Check the background for neighbours, house numbers and anything else that identifies where you live.
- Take extra care with photos of children. Many families prefer not to share children's swimwear photos at all.
Offer a phone-free option too. Some guests will relax more knowing there is a time when the cameras are put away completely. If you are staying somewhere else, our guide to hot tub breaks in the UK explains what to check about overlooked tubs before you book.
How long should you stay in the tub during a photo shoot?
Photo shoots often run longer than a normal soak, because people wait for the right light or retake a shot. At 40°C (104°F), many manufacturers suggest around 15-20 minutes before a break, with longer sessions possible at lower temperatures. Guidance varies between makers, so check your tub's manual.
Set a phone timer for about 15 minutes as soon as you get in. While you wait for the light or repeat a shot, it is easy to lose track of how long you have been soaking, and the timer reminds everyone to take a break.
Plan a long shoot as rounds rather than one long soak. Get out and cool down for 5-10 minutes between each round, and use that time to check the photos you have taken.
Take regular breaks on the edge or out of the tub, and drink plenty of water. Alcohol and heat together make dizziness and dehydration more likely, so keep drinks light and alternate with water. Edge sits and outside shots are a good way to cool down without stopping the shoot.
Drink a full glass of water before getting in, and keep a water bottle of at least 500 ml (about 17 fl oz) within reach. You sweat in hot water without noticing, because the water hides it, so dehydration builds faster than most people expect.
Alcohol also affects balance, not just hydration. Poses that involve climbing in and out or sitting on the rim become riskier on wet surfaces after a drink or two.
Everyone should shower before getting in, which keeps the water clearer for the photos too. Anyone with an open wound or a skin condition should stay out of the tub and join in from the side.
If anyone feels lightheaded or unusually warm, they should get out straight away. Sit somewhere cool and shaded, and stay there until they feel normal again before going back in or carrying on with the shoot.
Get out and cool down straight away if anyone feels dizzy, sick, very thirsty, has a headache or starts to feel confused. These can be signs of overheating. The NHS guidance on heat exhaustion and heatstroke explains what to do and when to call for help.
If you are pregnant, have a heart condition, high or low blood pressure, or take medicines that affect your heart or circulation, speak to your GP, pharmacist or midwife before using a hot tub. The NHS pregnancy pages advise avoiding getting too hot during pregnancy.
Watch the surround as well as the water. Wet decking at dusk can be slippery, so keep the area around the camera spot clear and lit. Our guide to hot tub decking ideas that suit UK gardens covers anti-slip boards and safe step layouts.
Summary: natural hot tub photos in a few simple steps
Balance and tidy the tub first, then shoot at dusk with warm garden lights and the cover kept on until the last moment for steam. Choose relaxed poses with a simple action, keep the camera low and on a tripod, and use the grid to frame people off-centre.
Try each pose at least three times before you judge it. The first attempts rarely look natural, and people relax as they get used to the camera.
Keep phones and anything with a plug away from the water, take breaks so nobody overheats, and agree with everyone before any photo is shared. A calm, comfortable evening will always give you better photos than a long, staged shoot.
Frequently asked questions
What should I wear for hot tub photos?
Plain, solid colours usually photograph better than busy patterns, which can look messy through steam and moving water. Darker colours show up well against light water, and soft neutrals suit warm dusk light. Remove jewellery that can tangle or come off in the jets. A dressing gown or a large towel near the tub lets people stay warm between shots without leaving the scene.
Can I take good hot tub photos at night?
Yes, but you need some light. Use your tub's built-in lights on a soft white or pale blue setting, plus warm garden lights around the tub. Turn off the camera flash and use your phone's night mode on a tripod, because night mode takes several frames and any movement causes blur. Ask people to stay as still as they can for a few seconds.
Why do my hot tub photos look foggy or blurry?
The usual cause is condensation on the lens. Steam and the change from a warm house to cold air both fog the glass. Wipe the lens with a soft, dry cloth before every set of photos. If the blur only affects moving people, the light is too low, so add more garden light or use a tripod and ask everyone to keep still.
Why does the water look green or murky in my photos?
Water that looks clear in person can look dull on camera if it is slightly cloudy or the light is mixed. First check the water is balanced and filters are clean. Then avoid mixing very different coloured lights, and use your editing app's white balance or warmth control to correct the colour. Clear, balanced water is the most reliable fix.
How do I fit everyone into a group photo in a small hot tub?
Shoot from a corner, step back as far as the space allows, and use the phone's wide-angle lens if it has one. Keep people near the middle of the frame, because wide lenses stretch faces at the edges. Seat people at different heights, and have one or two sit on the edge outside the water so nobody is squeezed out.
Is it safe to use my phone while I am in the hot tub?
It is safest to keep your phone out of the water and off the rim. Water resistance ratings are usually tested in fresh water and many warranties exclude liquid damage. If you want photos from inside the tub, use a waterproof pouch with a wrist strap and dry hands. Never charge a phone near the tub, and keep chargers and leads indoors.
What is a cowboy hot tub?
A cowboy hot tub is a large galvanised metal stock tank, originally made for watering livestock, that is filled with water and heated. It is popular as a rustic, lower-cost option, and the raw metal gives a distinctive look in photos. Heating is often by a wood-fired stove or an external heater, so keep the heater, any fire and hot metal parts well away from people, towels and the camera area.
Filed under